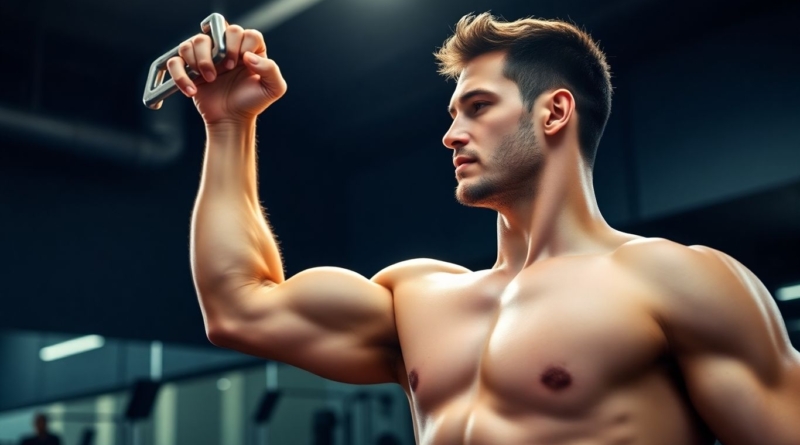
10-Minute Arm Workout (No Weights)
Tricep Dips
Alright, let’s talk about tricep dips. These are fantastic because you can do them pretty much anywhere, and they really hit those triceps – you know, the muscles on the back of your arms that give them that nice shape. You don’t need any fancy equipment for this one, just a sturdy chair or even the edge of your couch.
To get started, sit on the edge of your chair with your hands gripping the edge, fingers pointing forward. Slide your hips off the chair so you’re supported by your hands. Keep your legs bent with your feet flat on the floor, or for a bit more challenge, extend them straight out in front of you. Just make sure your knees aren’t locked.
Now, slowly lower your body down by bending your elbows. Try to keep your elbows tucked in close to your body, not flaring out wide. Lower yourself until your upper arms are about parallel to the floor. Then, push back up using your triceps to straighten your arms. It’s all about controlled movement here.
Here’s a quick breakdown:
- Starting Position: Sit on the edge of a stable surface (chair, bench) with hands gripping the edge, fingers pointing forward. Slide hips off.
- Execution: Lower your body by bending elbows, keeping them tucked. Go down until upper arms are parallel to the floor.
- Return: Push back up using your triceps.
Aim for about 3 sets of 10 to 12 repetitions. If that feels too tough at first, don’t worry. You can always modify it by keeping your knees bent and closer to the chair, which makes it a bit easier. As you get stronger, you can try extending your legs further out. This exercise is a great way to build strength in your arms, and you can find more bodyweight exercises to complement your routine here.
Remember, consistency is key. Doing these regularly will make a noticeable difference in how your arms feel and look.
Plank Shoulder Taps
Alright, let’s talk about plank shoulder taps. This move is fantastic for really zeroing in on your shoulder stability and core strength, all without needing a single dumbbell. You’ll start in a standard high plank position – think push-up position, but with your arms straight. Make sure your hands are directly under your shoulders, and your body forms a nice, straight line from your head all the way down to your heels. Keep your core tight; imagine you’re bracing for a punch.
Now, here’s the tricky part: you’re going to lift one hand and tap the opposite shoulder. The key here is to move slowly and with control. Try not to let your hips wobble or sway too much. This is where your core really has to work overtime to keep you stable. Once you’ve tapped, place that hand back down, and then repeat on the other side. It’s a simple concept, but doing it with good form is what makes it effective.
Here’s a quick breakdown:
- Starting Position: High plank, hands under shoulders, body in a straight line.
- The Movement: Lift one hand, tap the opposite shoulder, return hand to floor.
- Focus: Keep hips as still as possible, core engaged.
- Alternating: Switch sides with each tap.
If you find it too tough to keep your hips steady, try widening your feet a bit. This gives you a broader base of support and makes it a little easier to maintain that plank form. It’s all about building that control and strength, so don’t rush it. Give it a good set of 10-12 taps on each side, and you’ll feel that burn!
Triceps Push-Ups
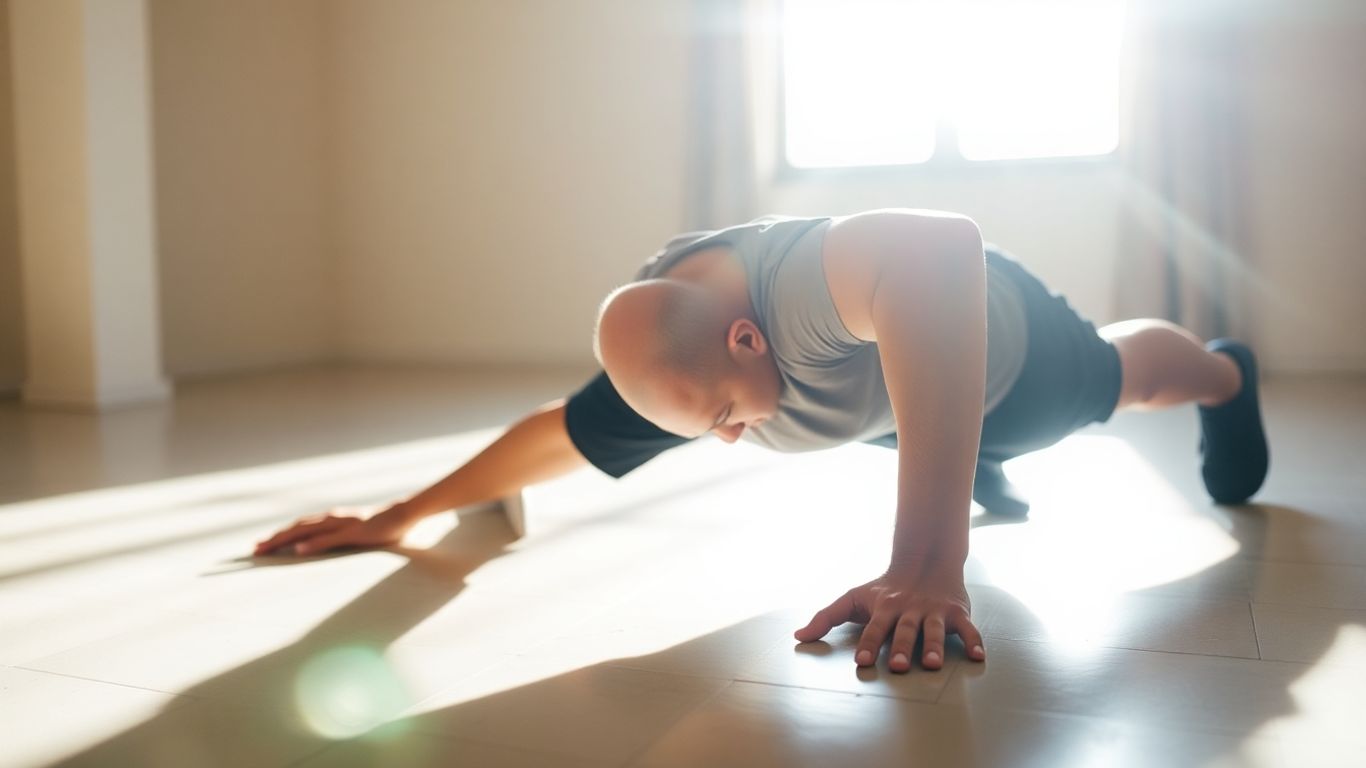
Alright, let’s talk about triceps push-ups. These are a fantastic way to really zero in on those arm muscles, specifically the triceps, which are the muscles on the back of your upper arm. Unlike a standard push-up where your elbows might flare out a bit, with triceps push-ups, you want to keep your elbows tucked in close to your body. Think of it like you’re trying to hug your sides with your elbows as you lower yourself down.
To get into the starting position, you’ll get down on the floor like you’re about to do a regular push-up. Your hands should be directly under your shoulders, and your body should form a straight line from your head all the way down to your heels. If that feels too tough to start with, no worries at all. You can always drop to your knees. This modification still works the same muscles but makes it a bit more manageable. It’s all about finding what works for you right now.
Now, for the movement itself. You’re going to bend your elbows, keeping them close to your body, and lower your chest towards the floor. Aim to get your chest almost to the floor, or at least until your upper arms are parallel to the ground. The key here is control. Don’t just drop down. Once you’ve lowered yourself, push back up to the starting position. Really focus on using your triceps to power that upward movement. Try to do about 10 to 12 repetitions for three sets. If you find you can’t quite hit that number, that’s okay. Just do as many as you can with good form. You can always build up to it. This exercise is a great way to build strength in your arms without needing any equipment at all, making it perfect for an at-home arm workout.
Here’s a quick breakdown:
- Starting Position: High plank (or on knees), hands under shoulders, body in a straight line.
- Movement: Lower chest towards the floor by bending elbows, keeping them tucked close to your sides.
- Push Up: Extend arms to return to the starting position, focusing on triceps engagement.
- Modification: Perform on knees if needed.
Remember, consistency is key. Doing these regularly will make a noticeable difference in your arm strength over time.
Push-Up Plus Reach
Alright, let’s talk about the Push-Up Plus Reach. This move is a bit of a step up from your standard push-up, and it really targets those shoulder muscles along with your chest and triceps. You start in a high plank, just like you would for a regular push-up, with your hands flat on the floor and about shoulder-width apart. Make sure your wrists are right under your shoulders – this is key for good form and to avoid strain.
Now, here’s where it gets interesting. You’ll lower yourself down as if you’re doing a regular push-up, but try to keep your elbows tucked in a bit, maybe at a 45-degree angle to your body. Lower down with control. Once you’re at the bottom, instead of just pushing straight back up, you’re going to do something a little different. Squeeze your shoulder blades together and lift your hands just an inch or two off the floor. This little lift engages your back muscles. Then, extend one arm straight out in front of you. This shifts your weight and really challenges your core and the supporting arm. After that, pull that arm back in, place your hand back under your shoulder, and then push yourself back up to the starting plank position. You can alternate which arm you reach with each rep.
This exercise is great because it adds an element of instability, forcing your core to work harder to keep your body steady. It’s a fantastic way to build shoulder strength and improve your overall upper body stability. If you’re looking to add a bit more challenge to your bodyweight routine, this is definitely one to try. It’s a good way to work on your push-up form and build that strength.
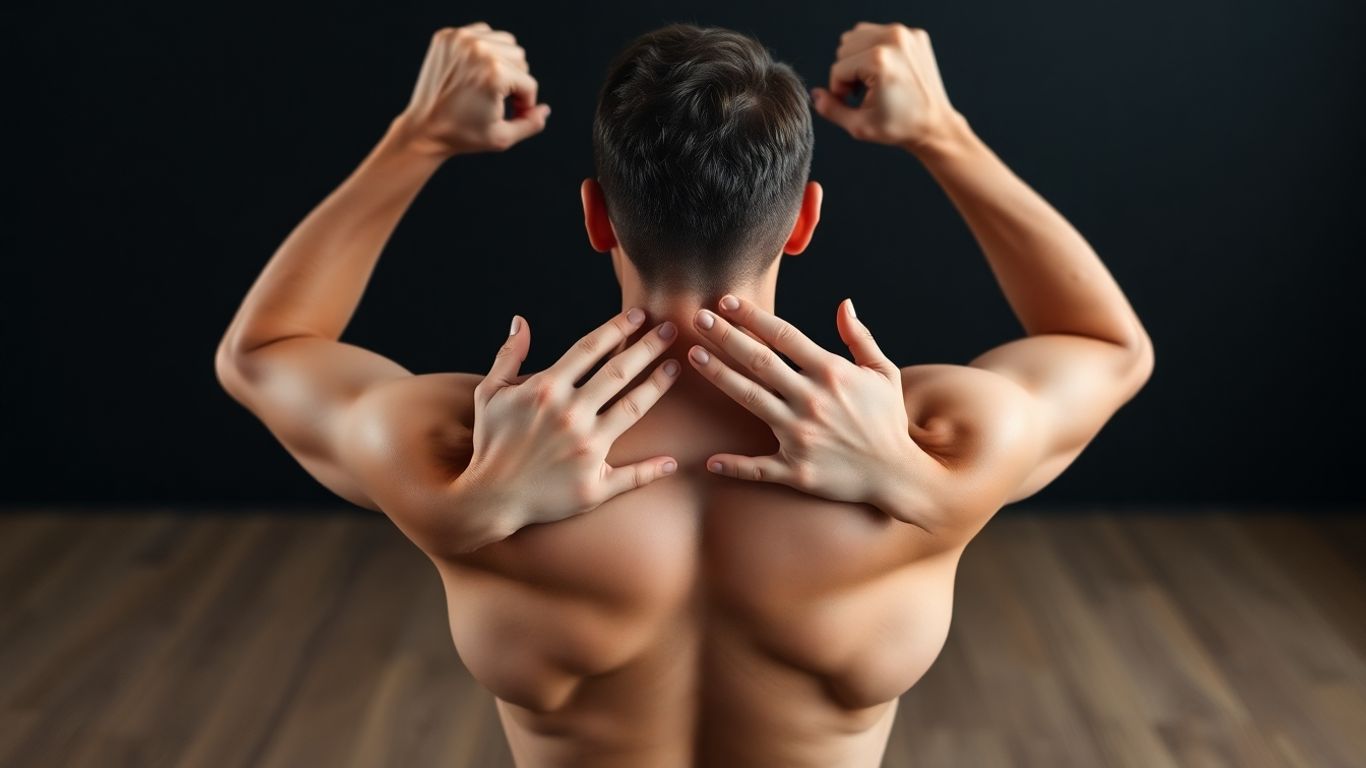
Bentover Row & Extension
Alright, let’s talk about the Bentover Row & Extension. This move is pretty neat because it works a few different muscles in your arms and upper back all at once.
To get started, you’ll want to bend at your waist. Think about hinging at your hips, keeping your back straight – no hunching over! Let your arms hang down towards the floor. Now, pull your elbows up towards the ceiling, bringing your hands up towards your sides. Really focus on squeezing those back muscles. Hold that position for a second, then extend your arms straight out in front of you, keeping them at that same height. After that, bend your elbows again, bringing your hands back towards your sides, and then let your arms hang straight down again. The key here is to control the movement throughout, especially on the way down.
This exercise is a fantastic way to build strength without needing any equipment at all. It really targets your upper back and the back of your arms, which are often neglected. If you’re looking to improve your posture or just want a more balanced upper body, this is a great one to add. You can do this as part of a circuit, or really focus on it for a few sets. Remember, even though there are no weights, you’re still working against your own body’s resistance, so keep those muscles engaged. It’s a good idea to check out some resources on proper form to make sure you’re getting the most out of it and avoiding any strain, especially on your lower back. Building a strong back at home is totally doable with exercises like these, proving weights aren’t always necessary for a powerful workout.
Overhead Press
Alright, let’s talk about the Overhead Press. This one feels like you’re trying to push a really heavy ceiling away from your head, and honestly, it’s a fantastic way to really feel the burn in your shoulders and arms.
To do it right, imagine you’re really pushing something heavy upwards. Keep your core tight and focus on squeezing those shoulder and arm muscles as you extend your arms straight up. It’s all about that controlled movement and really engaging the muscles.
Here’s a breakdown of how to get the most out of it:
- Engage your core: Think about pulling your belly button towards your spine. This keeps your body stable and prevents you from arching your back too much.
- Squeeze your glutes: This might sound odd, but tightening your glutes helps to stabilize your entire body, making the press more effective and safer.
- Control the movement: Don’t just fling your arms up. Press with purpose, and then slowly lower them back down. The lowering phase is just as important for building strength.
This exercise is great because it works multiple muscles in your shoulders and arms simultaneously. It really targets the deltoids, which are the muscles that give your shoulders that rounded look, and also engages your triceps. If you do it with good form, you’ll definitely feel it working!
Arm Circles
Alright, let’s talk about arm circles. These are super simple but surprisingly effective for warming up your shoulders and getting some blood flow going. You don’t need anything for this one, just a little space to move.
To do them, stand up straight. Let your arms hang down by your sides. Now, extend your arms straight out to your sides, like you’re making a ‘T’ shape with your body. Keep your arms straight and your elbows locked – no bending allowed! The key here is to keep tension throughout your arms the whole time. You should feel it in your shoulders and even a bit in your biceps and triceps.
Start making small circles with your arms, rotating them forward from your shoulders. Keep those circles controlled and smooth. Focus on maintaining that tension and a steady pace. After you’ve done a good number in one direction, switch and go the other way. You can play around with the size of the circles too; bigger circles will challenge your shoulders a bit more, while smaller ones can feel more like a controlled movement.
Try to do about 10 to 20 circles in each direction. You can do a few sets of these. It’s a great way to get your shoulders ready for whatever comes next, or just to get a little movement in if you’ve been sitting for a while.
Superwoman
Alright, let’s get into the Superwoman. This move is fantastic for hitting your back muscles, especially those along your spine, and it also gives your glutes a good squeeze. It’s a great way to build up some strength in your posterior chain without needing any equipment at all.
To get started, you’ll want to lie flat on your stomach. Extend your arms straight out in front of you, like you’re about to fly, and keep your legs extended behind you. Now, the key part: simultaneously lift your arms, chest, and legs off the ground. Really focus on squeezing your glutes and keeping your neck in a neutral position by looking down at the floor. You should feel a nice stretch through your chest and a good contraction in your back and glutes. Hold this position for a moment, really feeling the engagement, and then slowly lower yourself back down. Repeat this movement for the desired number of repetitions. It’s a simple yet effective exercise that really targets those often-neglected back muscles, contributing to better posture and overall upper body strength.
Here’s a quick breakdown of how to perform the Superwoman:
- Lie face down on the floor with your arms extended overhead and legs straight.
- Engage your core and glutes.
- Simultaneously lift your arms, chest, and legs a few inches off the floor.
- Hold the lifted position for a brief moment, focusing on squeezing your back muscles.
- Slowly lower back to the starting position.
- Repeat for the desired number of reps.
Palm Presses
Alright, let’s talk about palm presses. This is a super simple move, but don’t let that fool you. It’s all about engaging those chest and shoulder muscles by really squeezing your hands together.
To do it, just stand up tall, maybe with your feet shoulder-width apart for a good base. Bring your hands together in front of your chest, like you’re about to clap, but keep them pressed firmly against each other. Now, the key here is to push your palms together as hard as you can. You should feel the muscles in your chest and the front of your shoulders start to work. Hold that squeeze for a few seconds, then relax just a little bit before pressing again.
The real magic happens when you focus on that intense contraction. You can even try different variations to keep things interesting. For instance, try pressing your palms together at different heights – maybe a little higher towards your chin, or lower towards your stomach. You can also try pressing one hand forward while the other stays put, creating a sort of diagonal push. It’s a great way to build some strength and get a good pump without needing any equipment at all. It’s a good exercise to add to your routine, especially if you’re looking for ways to strengthen your body and prevent cycling injuries.
Back Bow Pulls
Alright, let’s talk about the Back Bow Pulls. This move is pretty neat because it really targets your upper back and even a bit of your lower back and glutes, all without needing any weights. You’ll be lying on your stomach for this one, so find a comfy spot on the floor.
First things first, engage your core, squeeze your glutes, and lift your chest, arms, and legs off the ground. Think about creating a slight arch in your back, but don’t overdo it. The key here is to use your own muscles to lift, not momentum. Once you’re in that lifted position with your arms extended overhead, it’s time for the ‘pull’.
Now, imagine you’re trying to pull something towards your sides. You’re going to bend your elbows and pull your arms down, keeping them close to your body. Really focus on squeezing your shoulder blades together as you do this. It’s like you’re trying to pinch a pencil between them. After the pull, extend your arms back overhead to the starting position. You’ll repeat this motion, focusing on that controlled squeeze and release. It might feel a little awkward at first, but trust me, you’ll feel that burn in your back muscles pretty quickly. Aim for a good number of reps, maybe 10-15, and really concentrate on the mind-muscle connection.
Wrapping Up Your 10-Minute Arm Blast
So there you have it – a quick and effective way to get your arms working without needing any equipment at all. You can totally do these moves while watching your favorite show or just whenever you have a spare ten minutes. It’s pretty amazing how much you can get done in such a short time, right? Remember, consistency is key, so try to fit this in a few times a week. Your arms will thank you for it, and you might even find yourself feeling a bit stronger in your everyday tasks. Give it a go and see how you feel!
Frequently Asked Questions
Can I really get a good arm workout without weights?
Absolutely! While weights can help, you can definitely build strength and tone your arms using just your body weight. Exercises like push-ups, dips, and planks work your arm muscles effectively. It’s all about using the right moves and keeping your muscles working hard.
How long should I do each exercise?
For a quick workout, aim to do each exercise for about 30 to 60 seconds. If you prefer counting reps, try for 10 to 12 repetitions per exercise. The key is to challenge yourself so you feel the burn.
Can I do this workout while watching TV?
Yes, this workout is perfect for doing while watching your favorite shows! Many of the exercises don’t require a lot of movement, so you can easily fit them in without missing any of the action on screen. Just make sure you have enough space to move your arms safely.
What muscles do these exercises work?
This workout mainly targets your arms, including your biceps and triceps. But it’s a great all-around upper body routine too! Your shoulders, chest, and even your back muscles get a good workout because they help stabilize your body during the movements.
How many times should I repeat the exercises?
You can repeat the whole set of exercises 2 to 4 times, depending on how much time you have and how you feel. If you’re new to this, starting with 2 rounds is a good idea. As you get stronger, you can add more rounds.
Is this workout good for building big muscles?
These bodyweight exercises are fantastic for building strength and toning your arms. While they might not build huge muscles as quickly as lifting heavy weights, they are a great starting point, especially for beginners. Consistency is key, and you’ll see improvements over time!